Penny Cozy Mittens Crochet pattern. In honour of Canada ceasing distribution of our penny, I have named my new mittens pattern after our has-been 1-cent token.
Here are some fun facts about the Canadian penny:
- other names for the penny have been "one-cent coin" or a "copper"
- the very first Canadian penny appeared on scene in 1858
- the first batches were made at the Royal Mint in London, England and shipped overseas to Canada
- on Jan 2, 1908, the Royal Canadian Mint opened in Ottawa and we finally could make the penny on domestic soil
- production of the penny actually ceased in May, 2012
- the backside of the penny shows Queen Elizabeth II (monarch at the time of issue)
- this design has been revamped 3 times in history
- between May 2006 to Oct 2008, each penny made from 1942 to 1996 was actually estimated to be worth $0.02 apiece because of the value of copper (which was a major constituent of the penny material in this period)
...And now you know!!
This pattern is for a pair of cozy, warm bulky mittens and it is
free here in PDF. I would love to see a photo of how these turn out for you!
You can purchase a pair of these mittens pre-made in my
Etsy shop!
These bulky, soft mittens are great for beginners to
practice working in the round. Each round spirals into the following round.
Rounds are joined at the end. This pattern uses standard US abbreviations and
crochet terms.
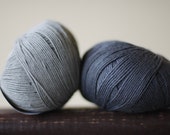
Materials:
Bulky
or 5 Weight Yarn (~ 100yds) – Use Alpaca or Wool blend yarn to create an extra
soft feel
S Size I
Crochet Hook (5.5mm)
4 X 15mm wood buttons or other buttons of your choiceYarn
threading needle
Abbreviations:
sl st= slip
stitch
ch = chain
sc=single
crochet
dc = double
crochet
RS= right
side
Rnd=round
Sts=stitches
St=stitch
Dc2tog=
double crochet two stitches together (join as one stitch)
The Pattern: (Make 2)
RIBBING
Ch 9.
Row 1: Sc
in 2nd ch from hook and in each ch across – (8 sts)
Row 2: Ch
1, turn, working in back loops only, sc in each sc across. (8sts)
Row 3-Row
19: Rep Row 2. Ribbing piece should
measure 6.5in from beginning.
Joining:
Fold fabric
in half with short ends aligned, sl st across both layers (8sts), making sure
short ends are aligned to join last row to first row. Do not fasten yarn.
BODY
Rnd 1
(right side): Turn ribbing fabric 90 degrees, Ch 1, 20 sc at regular intervals around top edge of
Ribbing; join with sl st in first sc.
Rnd 2: Ch 2
(not counted as a proper st here and throughout), dc in each sc around; join
with sl st in top of starting ch.
Rnd 3: Ch
2, dc in first 8 dc’s, 2 dc in next dc, dc in nxt 2 dc, 2 dc in next dc, dc in
last 8 dc; join with sl
st in top
of starting ch (22sts)
Rnd 4: Ch
2, dc in first 9 dc, 2 dc in next dc, dc in nxt 2 dc, 2 dc in nxt dc, dc in
next 8 dc, 2 dc in last
dc; join
with sl st in top of starting ch (25 sts)
Rnd 5: Ch
2, dc in first 10 dc’s, 2 dc in next dc, dc in next 2 dc, 2 dc in next dc, dc
in last 11 dc; join with
sl st in
top of starting ch (27sts)
THUMB OPENING
Rnd 6: Ch
2, dc in first 10 dc, ch 2, sk nxt 7 dc
for thumb space, dc in last 10 dc; join with sl st in top of
starting
ch (20 sts and 1 ch)
HAND
Rnd 7: Ch
2, dc in each dc and ch around; join with sl st in top of starting ch- (22 dc
sts)
Rnd 8: Ch
2, dc2tog, dc in each dc until last 2 dc, dc2tog; join with sl st in top of starting
ch – (20 sts)
Rnd 9: Ch
2, dc in each dc around; join with sl st in top of starting ch. (20 sts)
DECREASING ROUNDS:
Rnd 10: Ch
2, dc2tog, dc in next 8 dc, dc2tog, dc in last 8 dc; join with sl st in top of starting
ch – (18 dc sts)
Rnd 11: Ch 2, dc2tog, dc2tog, dc in next 10 dc around,
dc2tog, dc2tog (14dc sts)
Rnd 12:
Ch2, dc2tog, dc2tog, dc in next 6 sts, dc2 tog, dc2tog (10dc sts)
Rnd 13:
Ch2, dc2tog, dc in next 4 sts, dc2tog (6dc sts)
Tie off and
weave tail ends through sts of last rnd and pull to close opening. Tie off
again.
THUMB
With RS
facing you, join yarn with sl st at side of thumb opening.
Rnd1: Ch 2,
dc in each skipped dc (7 skipped) and sc in each ch (2chs) of thumb opening –
(9sts)
Rnd2: Ch2, dc in each st (9sts)
Rnd3: Ch2, dc2tog, dc in each of the following 3 dcs, dc2tog, dc2tog (5sts), sl
st at starting ch, tie off and pull top opening tight, weave in ends.
FINISHING
Weave in loose
ends with yarn needle.
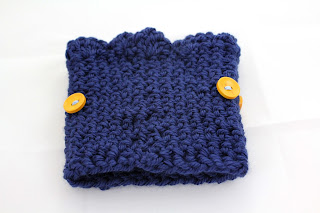
BUTTONS
Sew 2 wood buttons at top of sc ribbing, 1 inch from outer hand border.
(Or sew on at any location of your choice for a cute, stylish look)
Turn other mitten around and repeat. Ensure you sew buttons on RS of mitten!
© karliboutique
You may not reproduce, sell, or replicate any part of this pattern. You may use
finished products for commercial purposes but please link back to my blog post:
http://karliboutique.blogspot.com. Every effort has been made to test and ensure
the accuracy of this pattern.